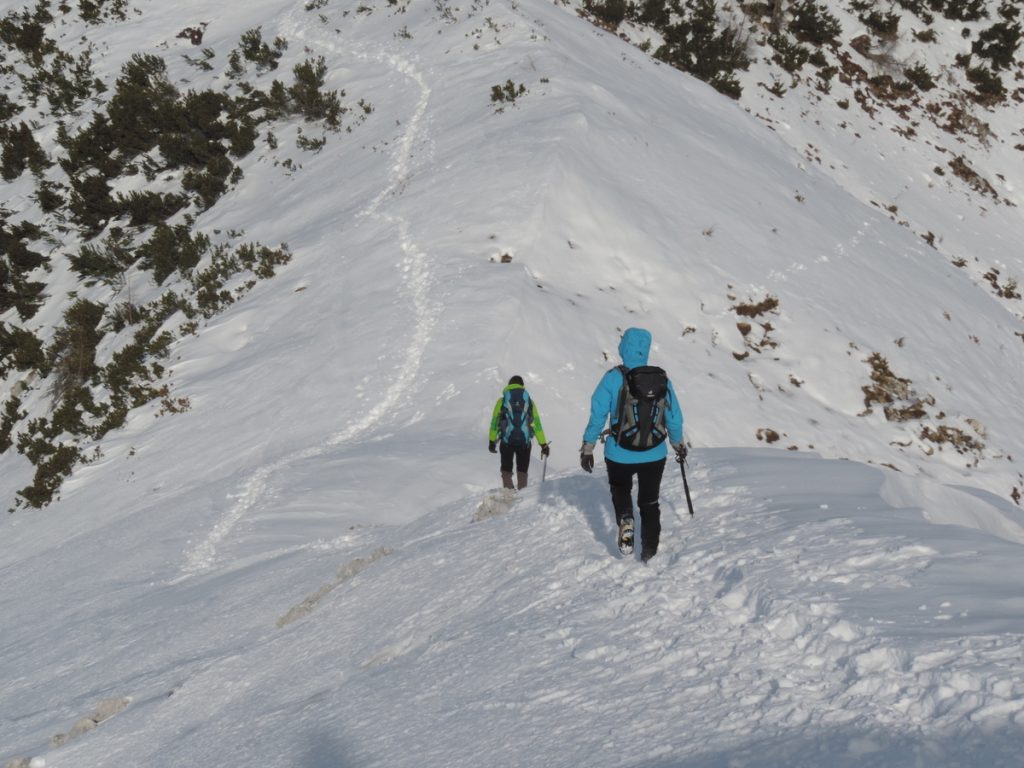
CONTENT
Winter is a wonderful season. It’s magical in the valley, but even more so in the mountains. But this magic, peace, and snow-covered slopes and peaks have their rules and quirks. If you don’t take the time to learn about them or intentionally ignore them, a magical trip can quickly turn into a nightmare. We recommend that all inexperienced mountain-goers hire a mountain guide.
BEFORE THE TRIP
Cold, strong winds, short days, different dangers, and different terrain appearance are the main characteristics of winter mountains. Winter clothing is different from light summer clothing for summertime mountaineering. It’s bulkier, heavier, and gets wet faster in the snow, which can lead to more rapid heat loss. As a result, your backpack must contain more spare clothes, plus a pair of extra gloves and socks. In winter, you’ll wear thicker jackets, down jackets, and mid-layers.
When you heat up during walking, your backpack can quickly become too small and very heavy, especially when it’s also filled with a thermos bottle, which is usually heavier than a regular water bottle, and other technical equipment (crampons, ice axe, avalanche gear, helmet).
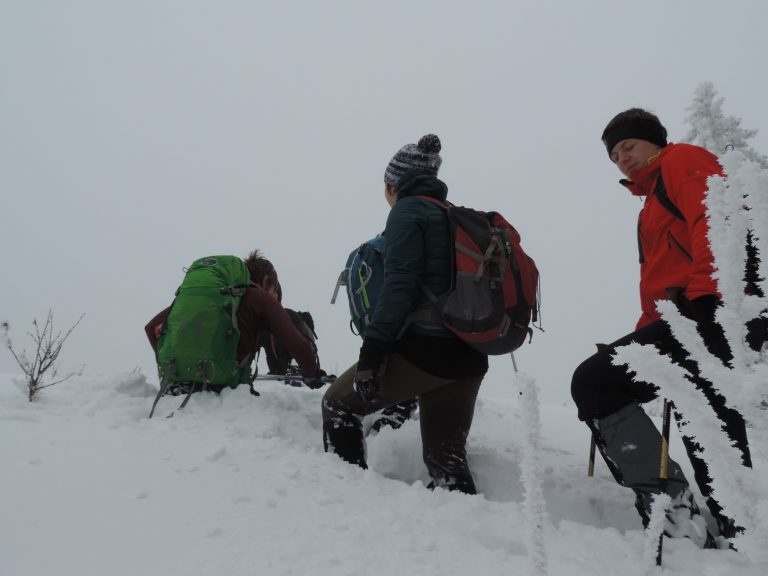
With a heavier backpack, energy consumption and walking times increase. If you’re not using snowshoes or skis, strenuous trail-braking can turn a few-hour hike into an all-day tour. Keep this in mind when preparing snacks at home – you’ll appreciate that extra sandwich or chocolate bar. Photo: PZS/Matej Ogorevc
On December 21st, when the day is the shortest (8 hours and 38 minutes), the sun rises around 7:40 AM and sets at 4:20 PM. If you’re late at the starting point in the morning due to traffic or are tempted by the warm stove of a mountain hut, darkness can catch up with you very quickly. A high-quality headlamp with a spare battery is a priceless tool. The same goes for a fully-charged power bank, which can charge your mobile phone. All batteries are sensitive to cold and deplete faster under normal use.
If you use your phone for navigation, the battery drains even faster. You can’t afford to have your phone die in the middle of the trip. In case of an accident, you won’t be able to call for help. If you somehow manage to make a call, communication with rescue services doesn’t end when you dial 112. You’ll probably exchange several phone calls, including longer ones.
Navigating in a snowy landscape can pose unique challenges even for experienced mountaineers. In open terrain, snow cover markings and avalanches are a constant threat. You might have to change your direction due to practical, navigational and/or safety reasons, which requires different pre-tour planning than in summer. Most of all, you’ll have to be able to adapt your route to the actual conditions while being alert to potential hazards and constantly seeking the safest path.
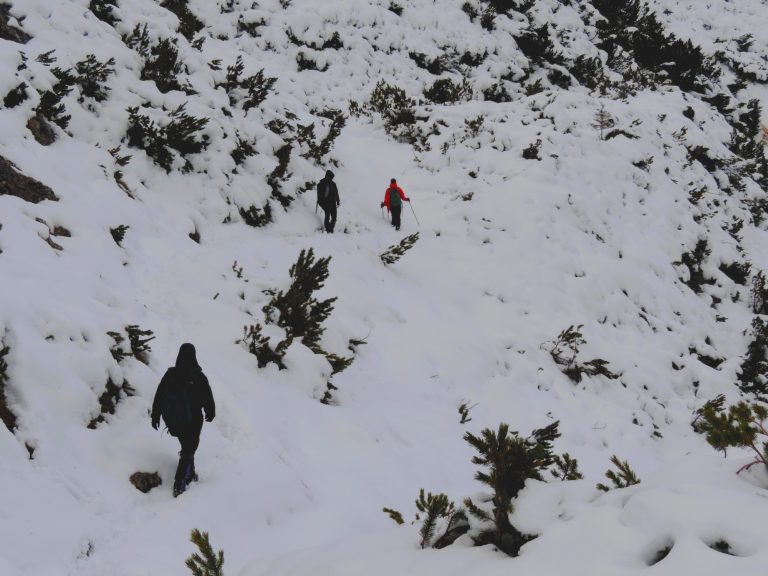
In snowy conditions, you can easily stray from the planned path. In such terrain, you must take the sufficient time to think before making any decisions. This is often much more time-efficient than having to correct your mistakes. Photo: PZS/Matej Ogorevc
Keep in mind that winter trips, especially those on exposed terrain, require much more knowledge and experience. Crampons and ice axes can be deadly if you don’t know how to use them properly. Likewise, avalanche victims can’t be rescued by companions who don’t know how to use avalanche gear. So you should constantly strive to improve your skills and refresh your knowledge.
WINTER EQUIPMENT (IN SNOWY MOUNTAINS)
The basic equipment for winter mountaineering is the same as for summer. However, for more comfortable and safer winter mountaineering, we recommend the following:
- winter mountain boots,
- gaiters to stop the snow entering the boots,
- high-quality clothing that protects against wind, cold, and moisture,
- sun protection (cream, sunglasses),
- warm drink and food.
Additionally, we recommend the following winter technical gear:
An ice axe is used mainly for self arresting after falls and to help in climbing and descending steeper slopes. You won’t be able to effectively self arrest without an ice axe!
For classic mountaineering, ice axes with straight or minimally curved shafts are used. Ice axes with distinctly curved shafts, so-called ice tools, are less suitable for walking and self arresting, which is why they’re not recommended.
The length of the ice axe is determined by holding the head of the axe in your hand with the spike turned towards your armpit. If the spike just reaches your armpit, the ice axe is the correct length. Alternatively, if you hold the ice axe by your side with an outstretched arm, the spike should reach your ankle. More experienced mountaineers may choose a slightly shorter axe.
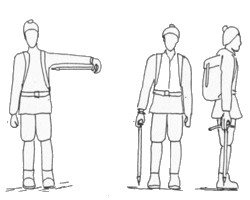
Drawing: Bojan Pollak
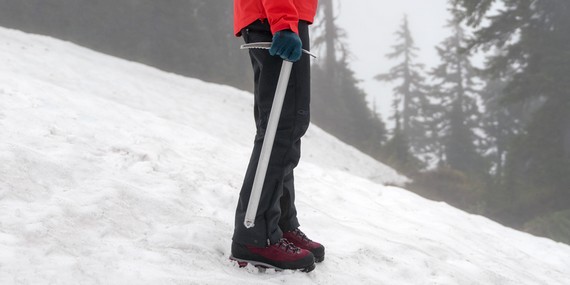
Hold the ice axe in your strongest hand (right hand for right-handers, left hand for left-handers) using the strap, which prevents losing the axe. The pick of the ice axe points backwards (towards your back), which puts it in the correct position for self arresting.
Source: splet
Only mountaineering crampons are suitable for walking on hard snow or ice. When wearing crampons, always have an ice axe in hand!
Mini crampons and similar gear are deadly on hard snow on steeper slopes! They should only be used for walking on gentle terrain.
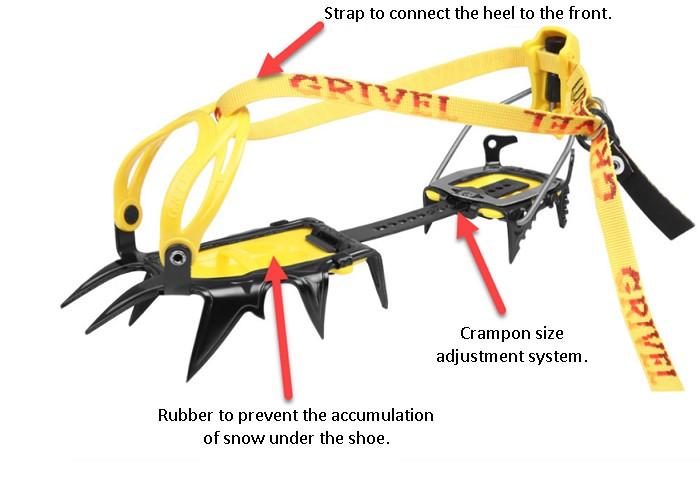
We recommend using 12-point or 10-point crampons, but these are rarer. In any case, crampons should have two front points for secure grip while walking and/or climbing. Single-point crampons or “monopoints” are not used; they’re only suitable for mixed climbing and dry tooling.
Source: Grivel & Matjaž Šerkezi
The choice of crampons depends mainly on the compatibility with the boots:
- Universal crampons: compatible with all types of boots (see below left image).
- Semi-automatic crampons: compatible with boots that have heel welts (see below middle image).
- Automatic crampons: compatible with boots that have heel and toe welts (see below right image).

Photo: PZS/Matej Ogorevc
Snowshoes are designed to facilitate walking in deep snow. They increase the “sole” surface area and reduce pressure on the snow, resulting in less sinking and improved stability. Walking with snowshoes on steep and/or icy slopes is extremely dangerous.
An avalanche safety set has become standard for anyone serious about mountaineering in winter or any other time mountains hold a significant snow cover. It consists of an avalanche beacon, shovel, and probe.
Avalanche backpacks are also used more and more often. All of this gear is used when moving on snow-covered terrain as it allows survival or, to put it more precisely, quick search for avalanche victims.
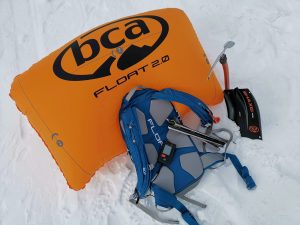
An avalanche safety set is a vital piece of equipment for any serious wintertime mountaineer. It consists of an avalanche beacon, shovel, and probe. An avalanche backpack is a welcome additional piece of kit. Photo: PZS/Matjaž Šerkezi
You can read more about avalanche gear and its use in the USING AVALANCHE EQUIPMENT article.
After a fall, you need to react immediately. Drive the pick of the ice axe into the snow and lean your entire weight on it. If you fall headfirst or on your back, turn onto your stomach as quickly as possible. This is the only way to stop effectively and quickly!
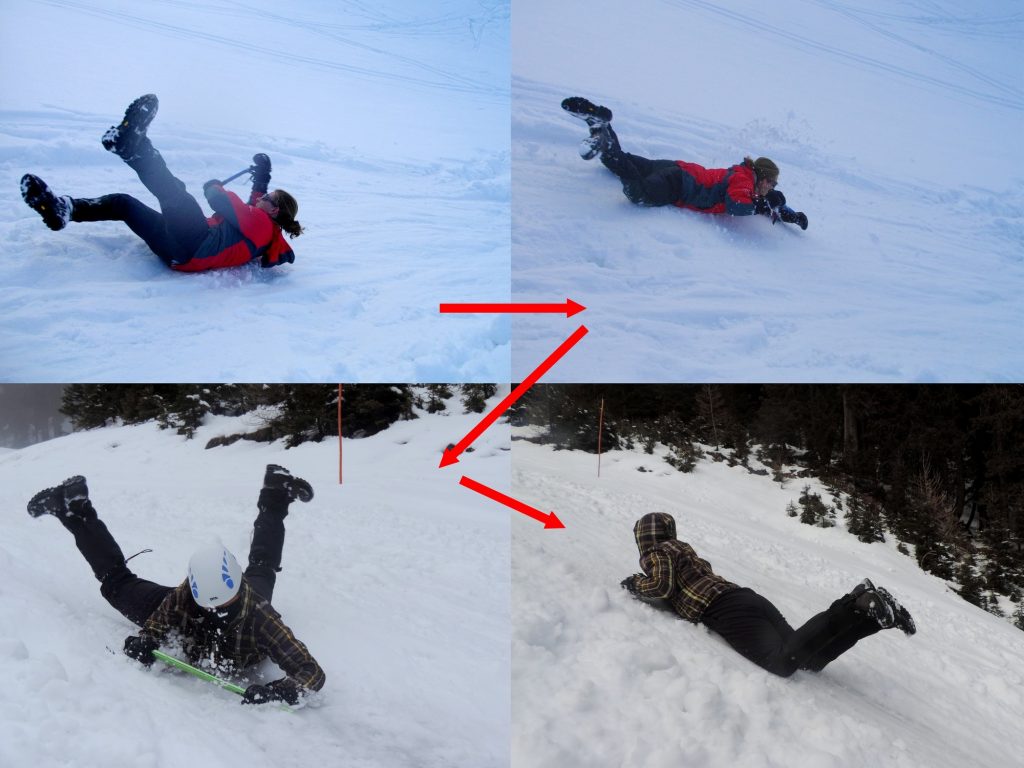
Photo: PZS/Matej Ogorevc
Before your trip, check your equipment at home (sharpness of crampons, charge of the beacon batteries, etc.). You must know your equipment and how to use it properly, otherwise it can be dangerous. It’s crucial that you strive to learn continuously and regularly practice your skills.
AVALANCHE
An avalanche occurs when part of the snowpack separates from another part due to the balance of forces in the snowpack being disturbed. An avalanche slides, flows, or rolls down the slope until losing all kinetic energy and coming to a stop. Technically speaking, an avalanche is defined as such when the snow mass moves more than 50 meters. Otherwise, it’s called a sluff. During winter, various layers of snow accumulate during snowfalls. The characteristics of each layer are determined by the type of snow (dry, wet), wind that transports snow and compacts it into slabs, and various processes of snow metamorphism. All of these factors combine to produce snow layers that aren’t uniform in height or physical properties.
Avalanche can occur as a result of:
- increased weight of the snowpack (additional snowfall, rain, warming);
- faceting (depth hoar, surface hoar);
- slabs (compacted layers formed wind or freeze-thaw cycles);
- additional load on the snowpack (falling rocks, cornice, etc.);
- load due to human activity (skiing, walking).
The huge forces acting on a body in an avalanche can cause severe mechanical injuries, low temperatures lead to hypothermia, and the lack of air in an avalanche can cause suffocation.
There are several types of avalanches:
Dry loose snow avalanches are the most destructive. They have enormous power, with snow sliding down the slope in the form of an aerosol, a large cloud. They are particularly dangerous because snow fills a person’s lungs, damages them, or causes suffocation.
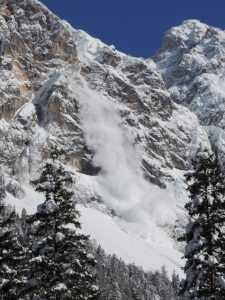
Photo: PZS/Matej Ogorevc
Wet loose snow avalanches originate from a single point and spread outwards as they slowly slide downhill. These avalanches are dangerous because of their weight and mostly occur on sunny slopes.
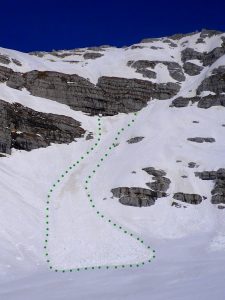
Photo: PZS/Matej Ogorevc
Slab avalanches (marked with red dots in the picture below) are among the most dangerous and claim the most victims. Slabs form as snow becomes denser due to wind, which causes it to bond into a cohesive, stable layer – a slab. When the bonds within the slab break, it slides down the underlying surface. Slabs can be thick or thin (from a few centimeters to a meter or more), and slab avalanches have a distinct, broad fracture line.
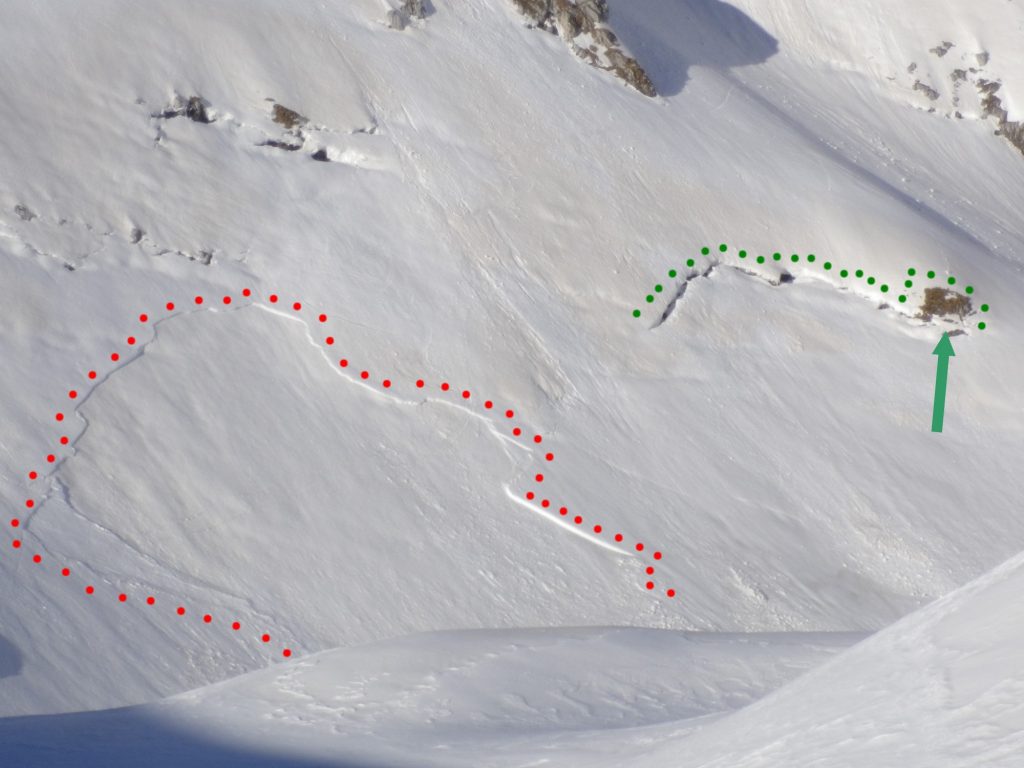
Photo: PZS/Matej Ogorevc
Glide avalanches (marked with green dots in the image below) mostly occur on sunny slopes when the snowpack becomes saturated with water due to melting. A layer of water forms between two layers or on the ground, along which a snow layer, and often the entire snowpack, slides down. Glide avalanches are often preceded by glide cracks, which spread in the shape of a fish mouth.

Photo: PZS/Matej Ogorevc
Especially men should make sure not to leave yellow snow in their trail. None of us finds it pleasant to see it when enjoying an idyllic tour through a snowy landscape. Try to answer nature’s call away from the trail. If that’s not possible, cover everything up with snow when you’re finished.
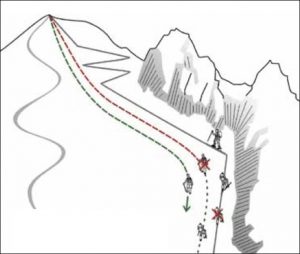
We often see tracks in the snow that are all over the place, making it difficult to determine which track is for ski tourers and which for hikers. Be mindful of others and everyone will have a much better, stress-free time in the mountains.
Hikers should make their own track and stick to it. Each subsequent hikers will make the track firmer, making walking easier and more pleasant.
Use a new track for the descent, because descending on the track used for the ascent destroys it and it becomes completely useless.
Ski tourers will be grateful if hikers don’t use their ski tracks for walking. Hikers make holes in the track, which make ski touring strenuous and even dangerous.
Drawing: Branko Ivanek

